HwP Online: Tips for Landscapes
Following on from our landscape classes we’ve put together some tips for you to follow, we’d love to see your attempts if you’d like to email them into to us!
Before you begin your composition, think about which way up you want the paper- it is traditional to have it lengthways- (this is called the landscape orientation).
Then look at the image, or landscape in front of you - where are you going to position the features in your picture? You might think that the most important feature or focal point should go in the centre of the page. However, artists and photographers think differently... if you think of your paper (or screen) as being divided into 3 sections- either left, middle and right or top middle and bottom- try to put a focal point somewhere off to one side, or at the top or the bottom of the picture. This creates a more interesting picture and leads your eye around the page. Have a look at some art books, and you might see that artists like Claude Lorraine, Titian and Seurat all put their ‘interesting bits’ anywhere except the centre.
When you put pencil to paper, the first thing you should draw is the horizon line. Remember- imagine the page divided into 3 sections- either put your horizon in the top third, or in the bottom third.
This is the most important part of the picture and will provide a guideline for where everything goes. Every object on the land will go below the horizon - anything in the sky goes above.
The objects closest to you will be biggest and will fill a lot of space on the page. As things get further away they become smaller, until the furthest object sits just on the horizon itself - and might just be a tiny speck!
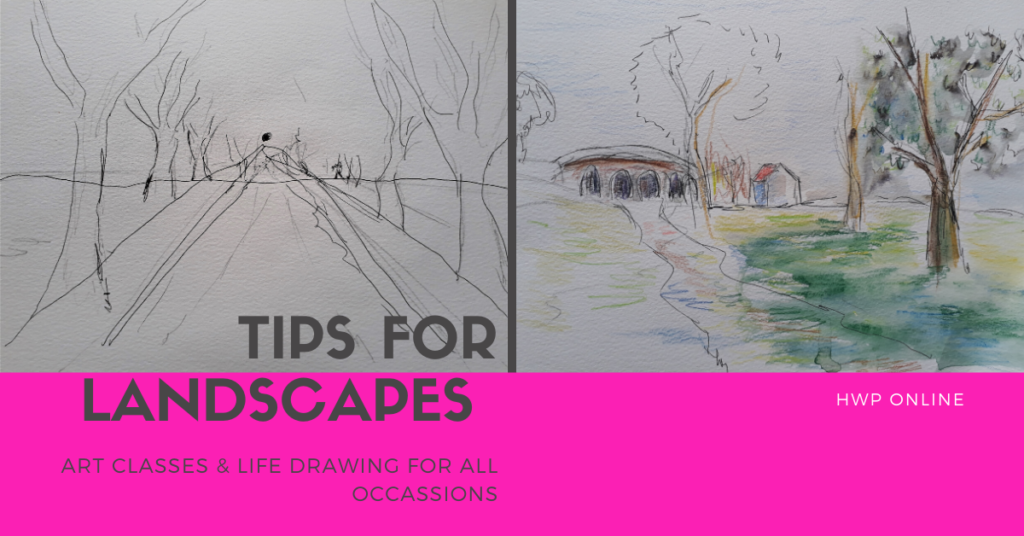
For example, imagine a line of trees getting further away. Also, have a look at the famous album cover of the Beatles Abbey Road album - this is a perfect example of a picture which shows perspective.
Even if you can’t see the horizon, you can easily imagine all the trees or other objects receding into the distance, and the point where they get furthest away is called the vanishing point. You can decide if your vanishing point is in the centre of the picture, or off to one side. all objects lead towards the vanishing point, getting smaller as they do so.
You might like to draw some faint lines, which you can rub out to help you decide where the vanishing point goes, and where your horizon is. The rest is up to you!
Don’t forget to use shading to show the direction of light on your landscape, shading and shadows can really help bring a picture to life.
The two images above show a sketch with guidelines meeting at the vanishing point and a landscape sketch in pen and blendable watercolour pencils.
Have fun!
HwP Tutor: Olivia Davies