HWP's 8 simple steps to drawing male lips with Mixed Media Artist - Emsky
Materials you will need: office paper, highlighters easily available at most local post offices and supermarkets (2 different colours are a must), CD/DVD marker or black pen, wine or champagne glasses, a bit of humour & that's it ;)
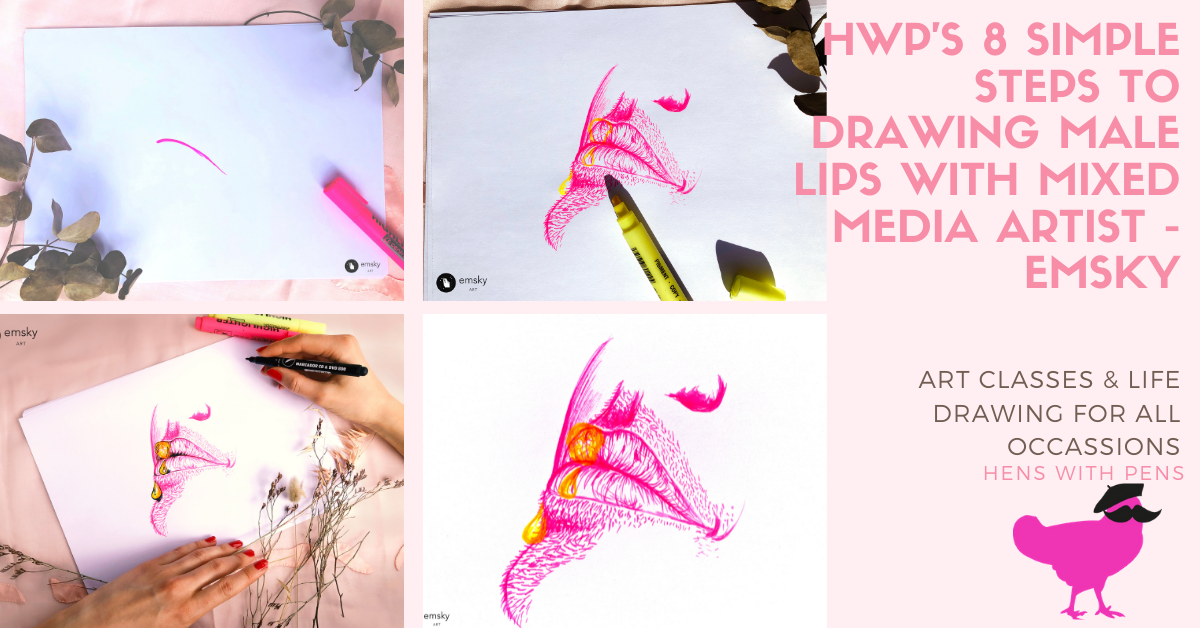
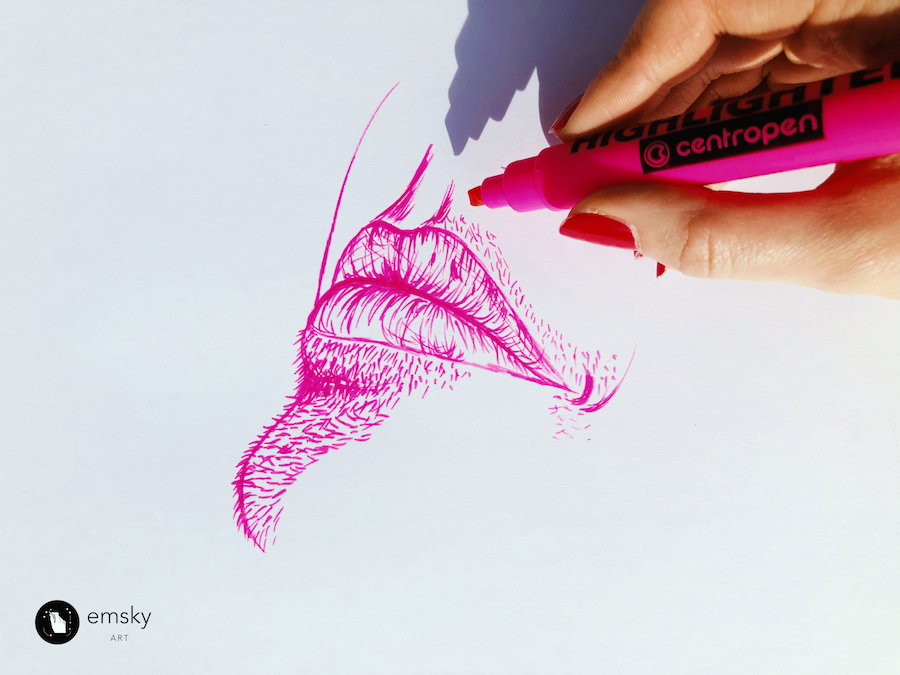
Step 1: Draw a small curve in the middle of the paper, it doesn't have to be perfect, it's important to make it thinner towards the end (ps: that's the corners of a mans mouth).
If you aim to draw in the middle you will automatically give yourself some space for all the next steps.
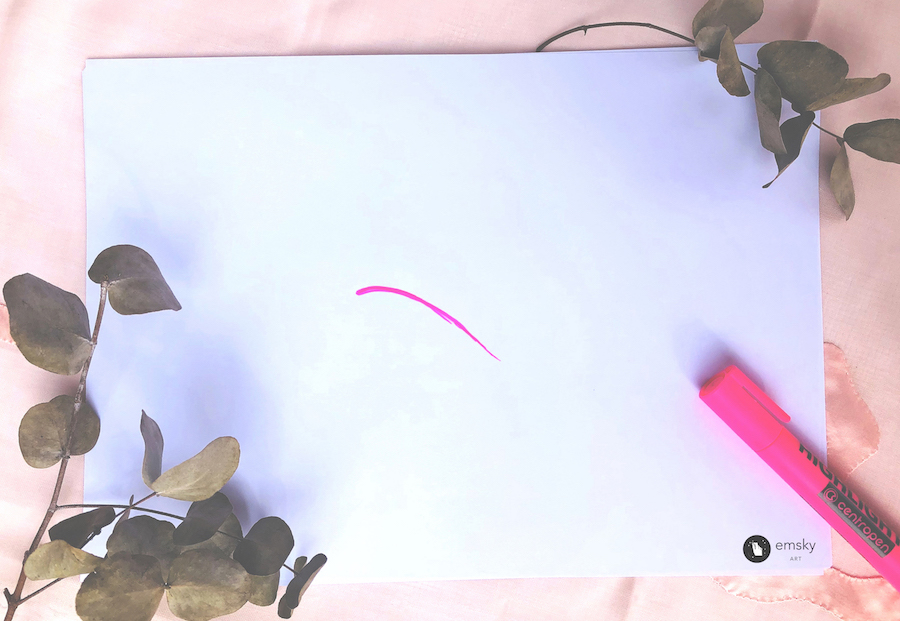
Step 2: Carefully, and with a steady hand draw the top of the lip, imagine that the man is laying on bed, and you are looking at him from the side.
This isn't vogue or Kylie Jenner, don't worry about making it fashion.
Once you do your top lip, add the bottom one. if it looks odd now, just be patient, we will be adding more manly (and sexy) features!
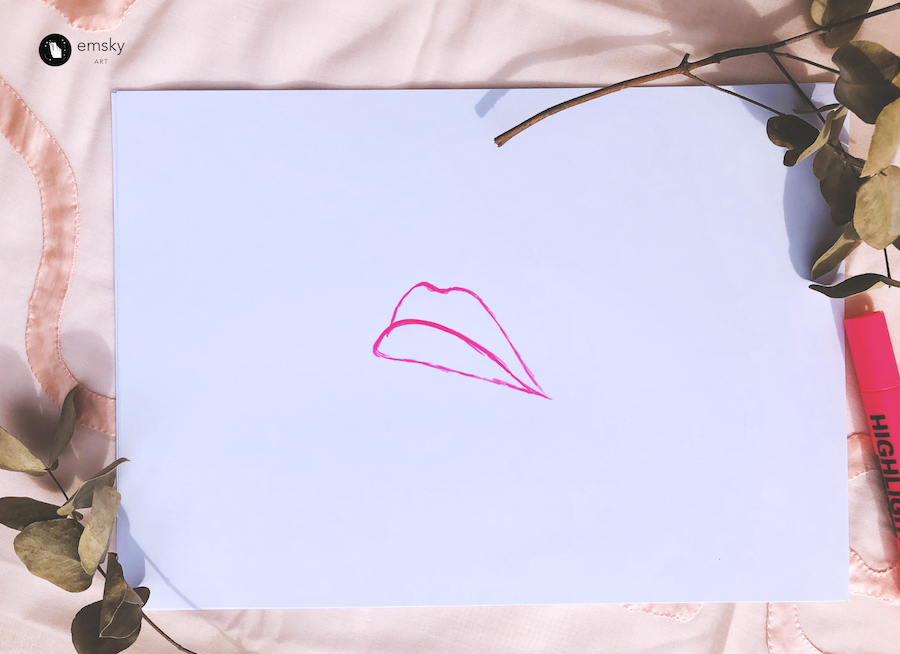
Step 3: Time for the details! always start in the middle of the mouth and draw small (and a few long) 'eyelash' lines following the natural form of lips.
We aren't advertising a lip gloss don't be afraid to make the lips look cracked and dry.
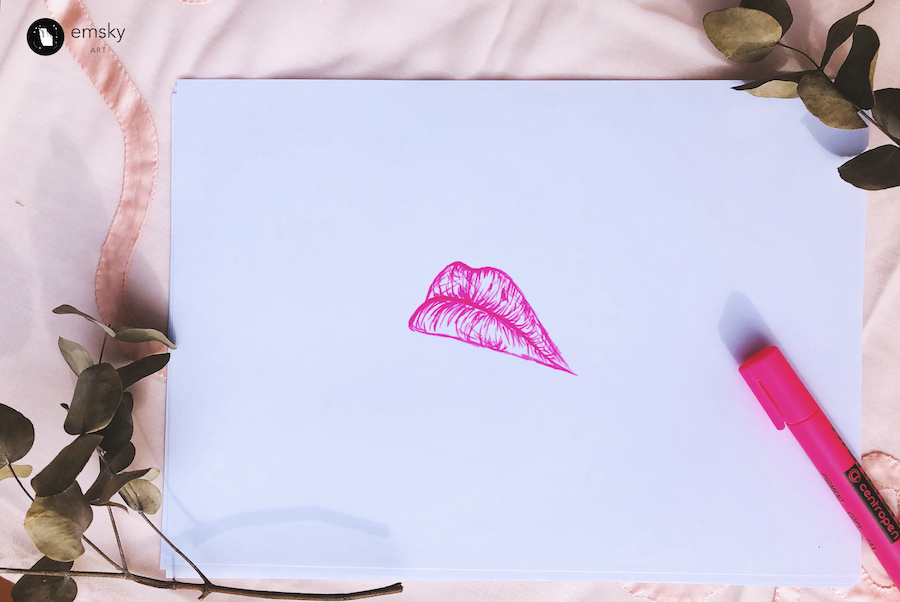
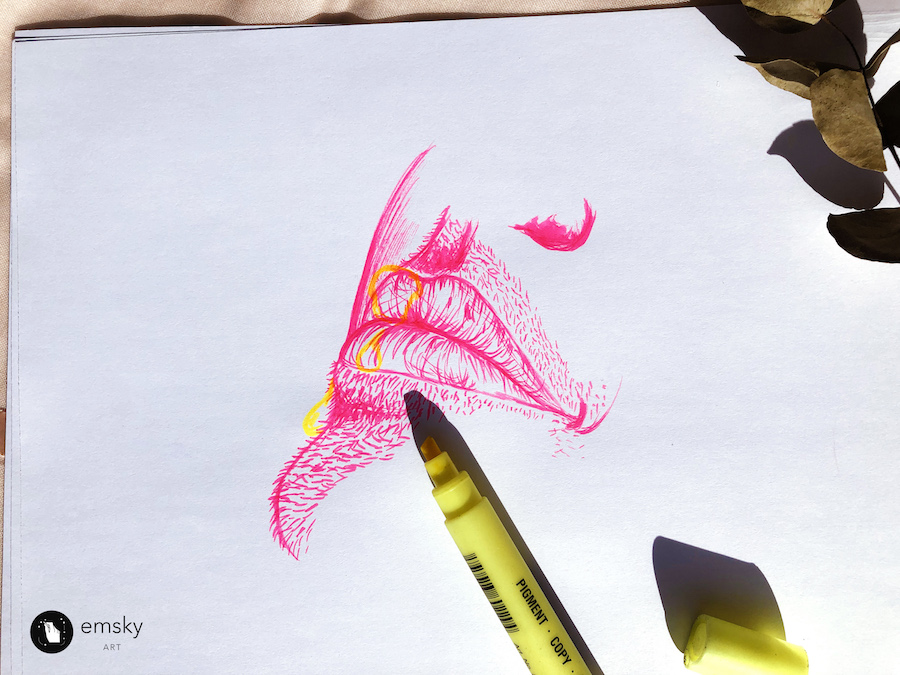
Step 4: Here comes the chin, side cheek, part of the nose and the plithrum. It's not necessary to fully define and finish, we will work with basic lines that do not touch the edge of our paper, as our masterpiece needs to be 'floating' in the middle of the paper.

Step 5: THE BEST PART, THE MANLY BITS?! not all men look hot with a prickly beard, but this surely adds to the hot men alert factor - giving your drawing a clear indication of its primary objective.
Start at the chin with small repetitive lines and make sure they follow the natural hair growth, otherwise logically - it will look very strange and unnatural.
The hair can sometimes cross each other, just make sure you don't attempt to draw hairs that touch the lip line directly, give the upper and lower lip some small space and then continue the beard drawing.
You can draw many more tiny lines to give your face the wanted amount of hair, I just decided to keep it simple.
Top Tip: Add more depth and shadow (still using the same highlighter) by creating repetitive thin lines focusing on underneath the lip, the corner of the mouth, and highlighting the (not so talked about) sensual plithrum!
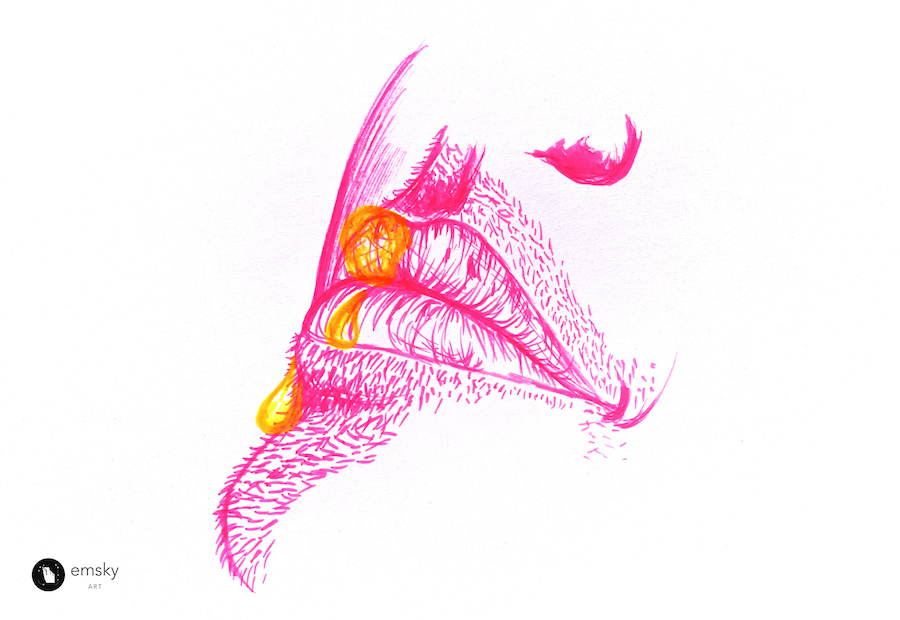
Step 6: This is the part of the drawing where you are allowed to add another colour, I chose yellow because it was the closest UV colour to honey.
Start by only drawing the outlines, it's up to you where exactly you draw the honey dropping, just make sure it's dropping down the chin and the lip.
Now that's sweet!
Step 7: Blend blend blend!
After you are satisfied with your outlines, and depending on the branding and colour of your highlighters - you will notice that the colours merge into orange making it even closer to the desired shade of honey.
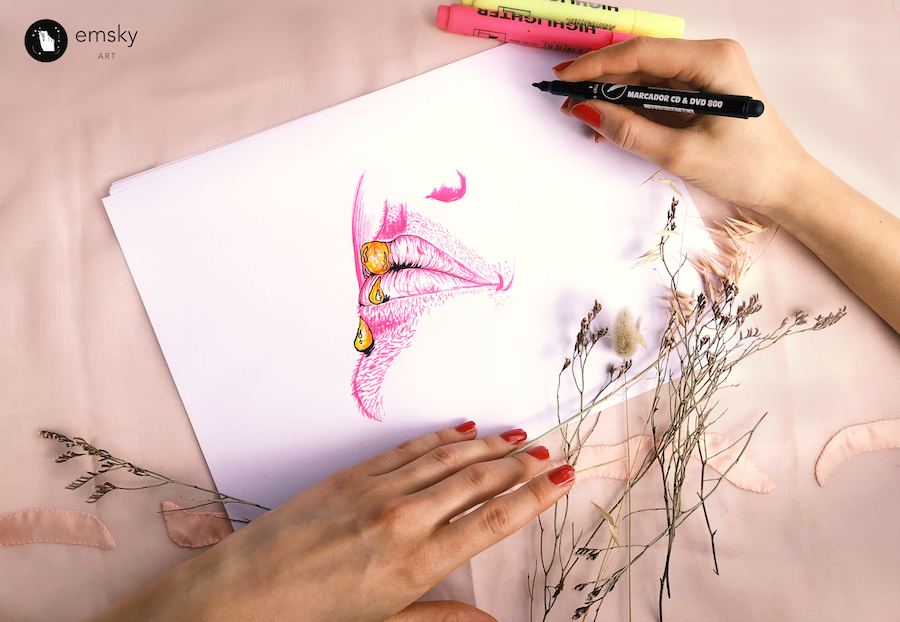
Step 8: Now let's add the last detail to give our 'hot mess creation' some depth and contrast, a modern edge, with a neutral colour that works really well black framing.
You don't need to go over everything, only the mouth and honey areas - and viola!
Additional step: For those who want to take it up a notch. Take champagne and wine glasses and use the top and bottom of the glasses as your 'compass' to add some shapes and character to your drawing. notice how different sides result with various thickness on the paper.
Make sure you hold the glass down on a flat surface, so that the glass doesn't move around and that you don't make unwanted smudges.
I added a bubble effect in mine, but you are welcome to leave the circles as completely blank.

Top Tip: If you want to take a good photo of UV highlighters, I always suggest choosing the 'vibrant' option in your Iphone/ smartphone settings. this will automatically bring out the colours even more!
Connect with Ema on social: